Gaming Accessories
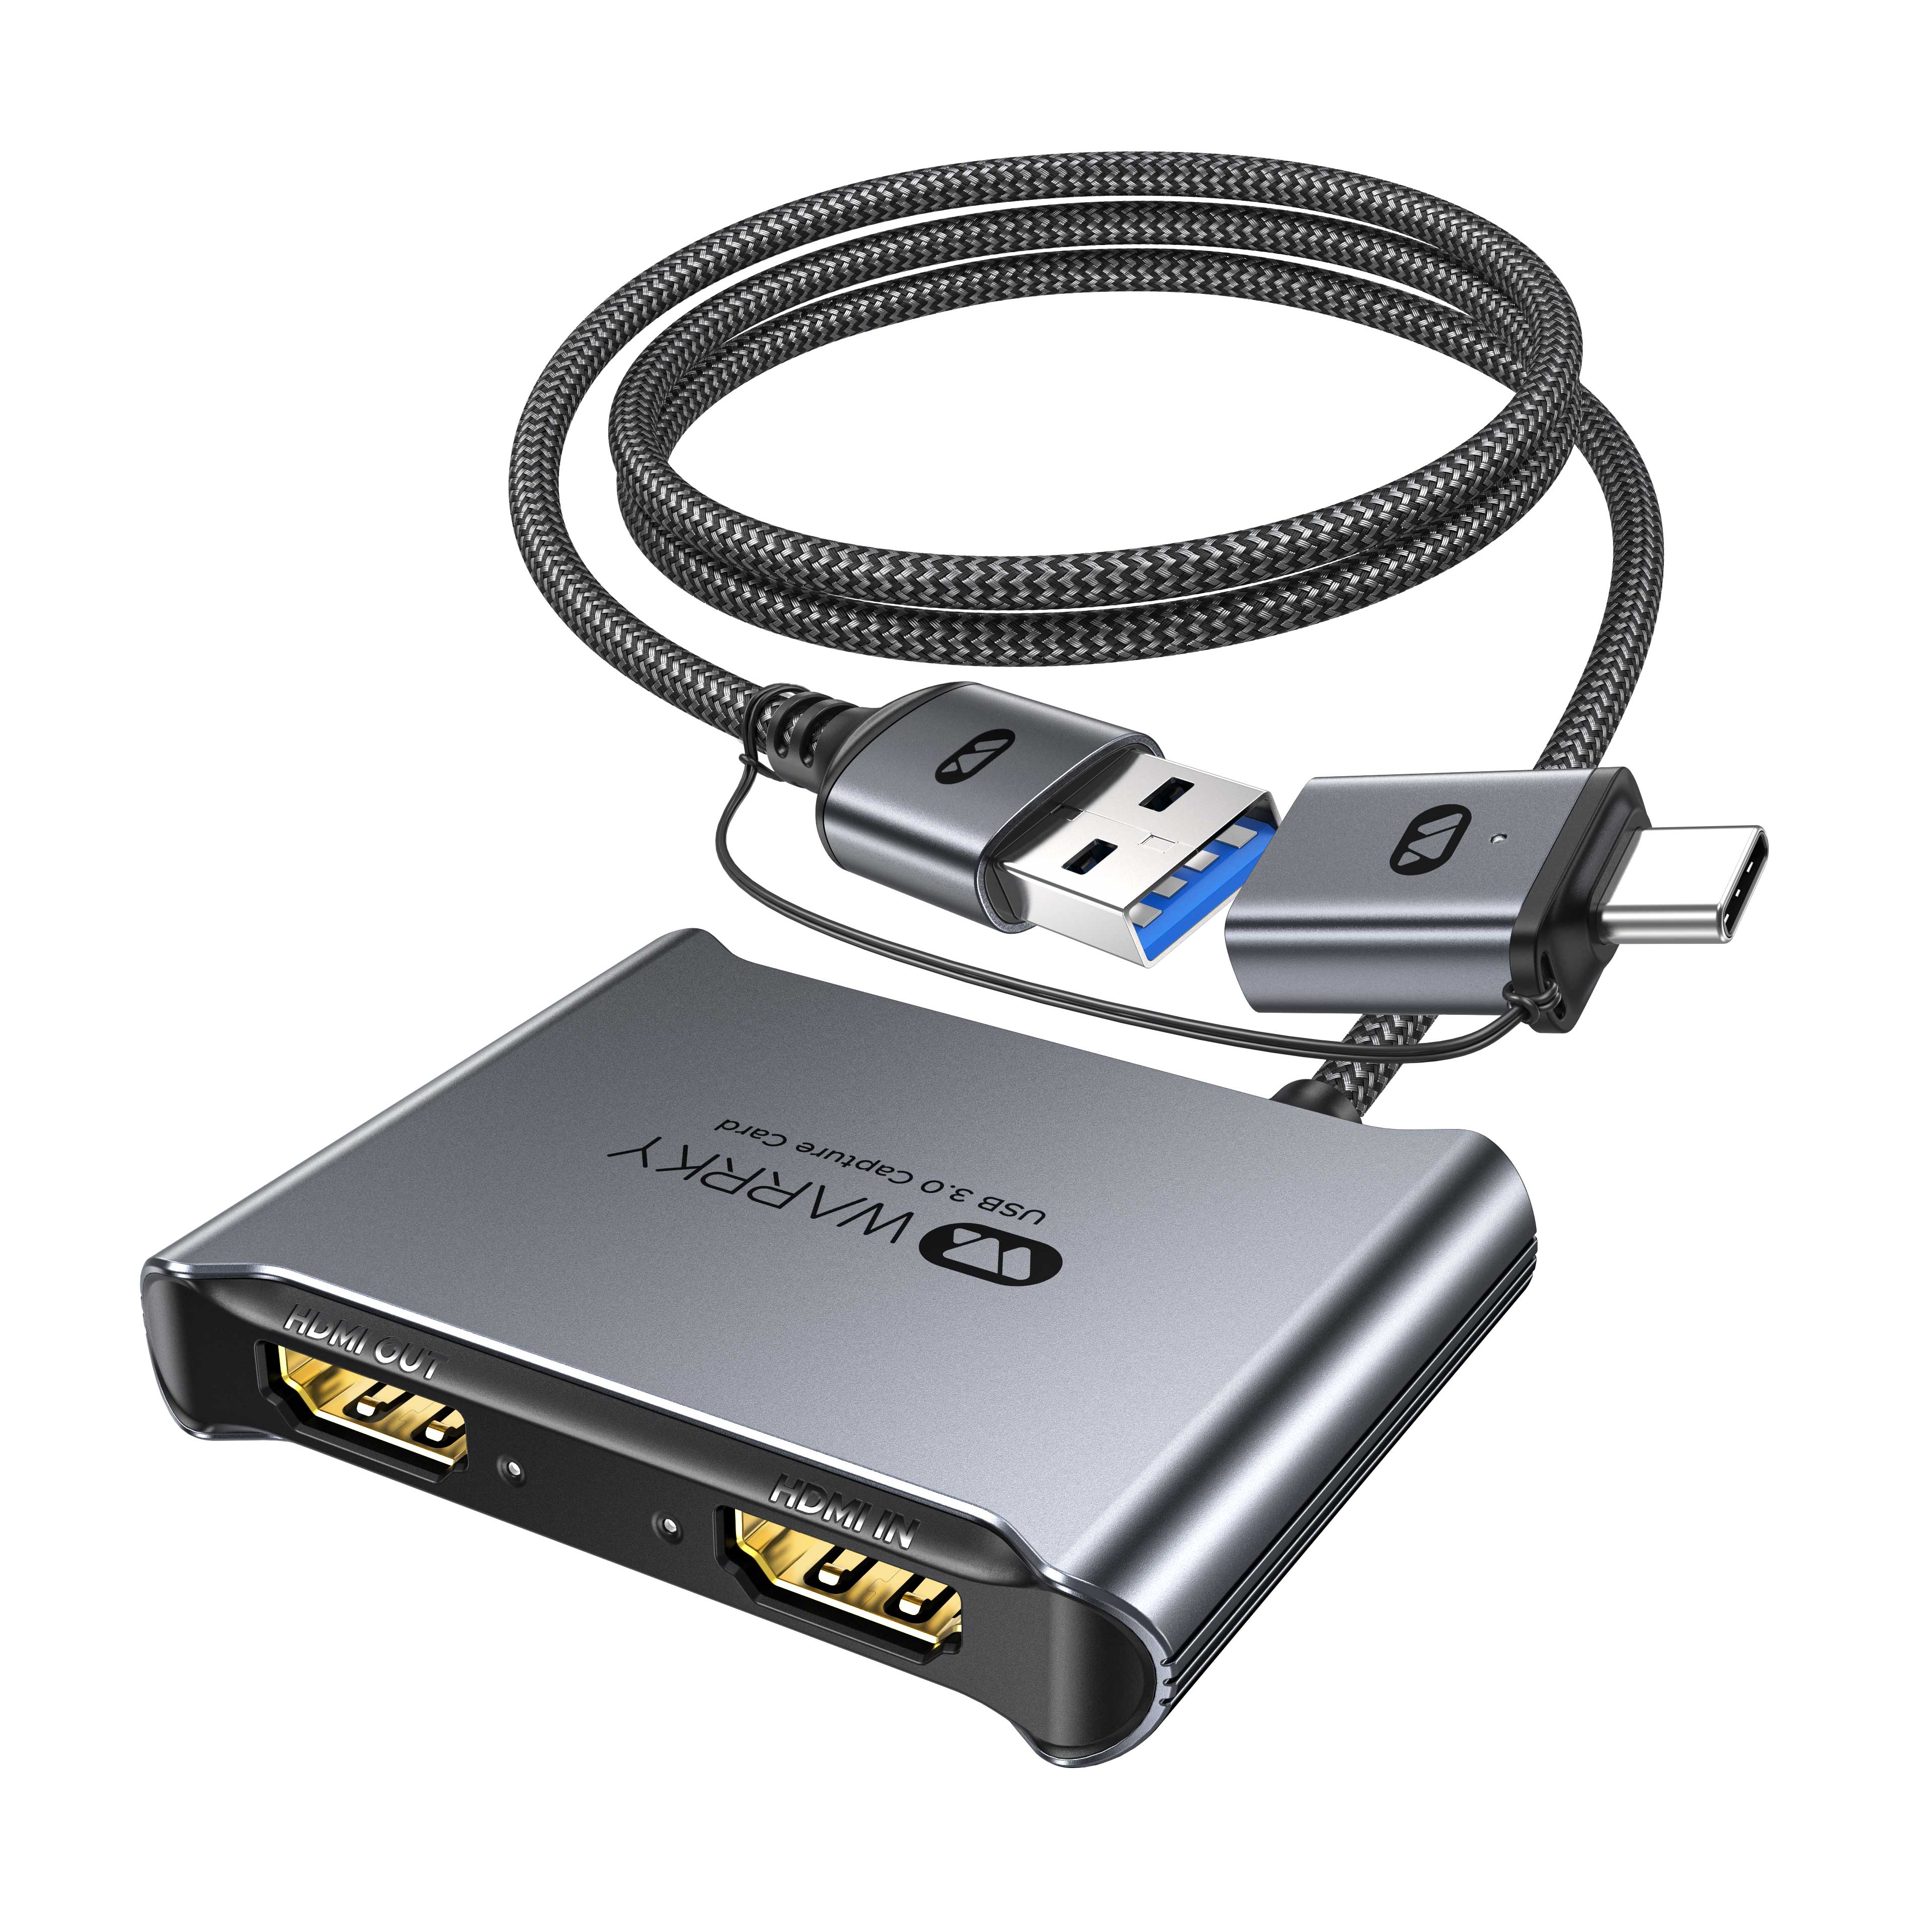
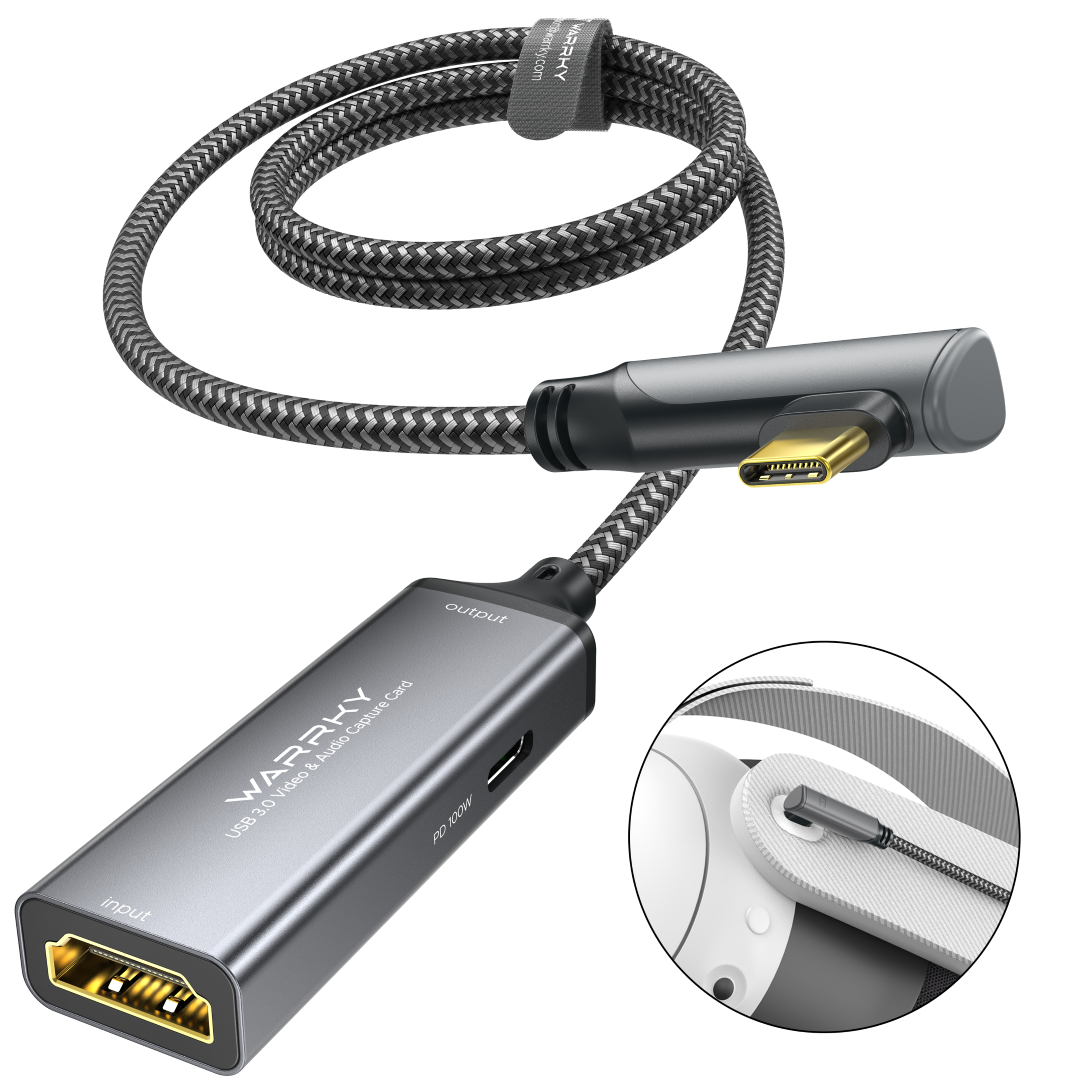
1080P 60Hz USB A/C Video Capture Card with 4K 30Hz Loop-out
If the solutions below cannot help resolve your issue, please contact us. We will provide help as soon as possible.
Why can't record in 1080p 60fps?
- Make sure to plug the capture card into a USB 3.0 port on your PC (refer to "lmportant Notice" to identify USB 3.0). The transmission bandwidth of USB 2.0 is not enough to stream 1080p60 videos.
- Make sure the capture resolution on your streaming software is 1080p 60fps.
- Contact WARRKY for a techniqual support.
Why does the captured video with no sound?
Here are some solutions for Windows:
- Windows "Settings" → "Privacy & Security" → "App permissions" → Click "Microphone" → Turn on "Let apps access your micro-phone" → Find your streaming software and enable it
- "Control Panel" → "Hardware and Sound" → "Sound" → "Recording" → Right-click "WARRKY USB 3.0" → Select "Properties"→"Listen" → Check the "Listen to this device" box
Can l use headphones with built-in mic on this capture card?
Yes, but the headphones must have two plugs and be connected to the audio-in and audio-out ports correctly. For headphones with only one plug, you can only plug it into the audio-out port for listening.
Do I need to install any driver for this capture card?
No, this capture card works with your streaming software right out of the box.
What is the warranty of this capture card?
This capture card comes with a lifetime warranty.

1080P 60Hz USB A/C Video Capture Card
If the solutions below cannot help resolve your issue, please contact us. We will provide help as soon as possible.
Capture Card with Right Angle USB C 3.0 for Oculus Quest 2/3, iPad
If the solutions below cannot help resolve your issue, please contact us. We will provide help as soon as possible.
Why won't the device charge or charge slowly?
The PD port only charges USB-C output devices like the Oculus Quest / iPad. For fast charging, use the original charger.
Why isn't the video resolution 1080P@60fps?
Ensure the capture software setting (1080P@60fps) and USB-C connection are secure.
Do I need to install a driver for the capture card?
No driver is required. It works directly with streaming software.
Why does screen tearing occur during use?
Enable V-Sync on your device and lower game FPS/resolution to reduce latency.
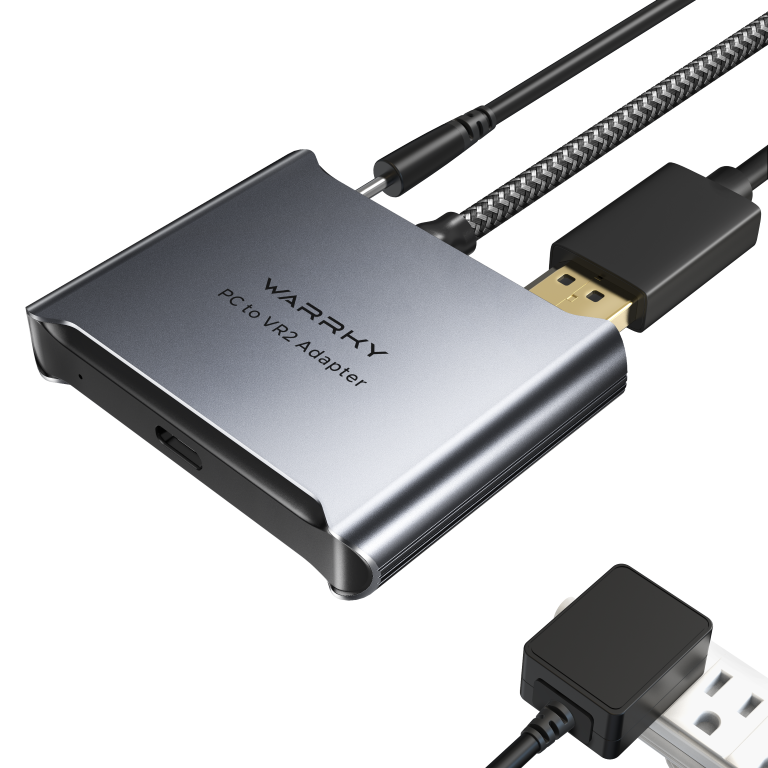
PSVR2 PC Adapter
If the solutions below cannot help resolve your issue, please contact us. We will provide help as soon as possible.
What are the required PC specs to use PS VR2 on PC?
Make sure your PC meets the following minimum spec requirements to use PS VR2.
How to connect your PS VR2 to PC
- Connect your PC adapter to your Windows PC's USB 3.0 Type-A port.
- Use a DisplayPort 1.4 cable (package included) to connect your PC adapter to your PC's DisplayPort port.
- Connect the supplied AC adapter (package included) to the DC IN connector on your PC adapter. Then, connect the AC adapter to an electric outlet.
- Connect your PSVR2 headset to your PC adapter's USB Type-C port and press the power button on your VR headset to turn it on.
- Open PlayStation VR2 App. Follow the on-screen instructions to complete the initial setup. Once you finish, you're ready to play VR games.
How to troubleshoot your PS VR2 on PC
General troubleshooting steps for PS VR2 on PC
- Check that your PC meets the minimum requirements for PS VR2.
- Check your connections. Unplug all cables and then reconnect them. Open PlayStation VR2 App and check your connection.
- You must connect your PlayStation VR2 PC adapter directly to the USB port on your PC. Ensure you are using an interface of USB 3.0 or higher. Do not use an extension cable or USB hub, as it may cause it to malfunction. If possible, try using a different USB port to connect your PS VR2.
- Make sure the DP interface is connected to the graphics card, not the motherboard. Ensure your PC has a native DisplayPort (DP) connection. DisplayPort over USB Type-C is not compatible with your PSVR2 PC adapter.
- Make sure you’re using the latest drivers for your graphics card. If you experience issues with the latest drivers, please try going back to an earlier version.
- Turn off your headset and PC. Once they're both turned off, turn on your PC and then turn on your headset. Then launch SteamVR, and try again.
- If you've installed any unofficial PS VR2 drivers, please remove all PS VR2 devices, and uninstall any unofficial drivers. Then, uninstall and reinstall the PS VR2 App.
Having connection issues while paring sense controller?
- Purchase the official Bluetooth adapter.
- Install the latest Bluetooth driver version from the manufacturer's website if the manufacturer provides a Bluetooth driver.
- Remove existing controller connection settings and reconnect.
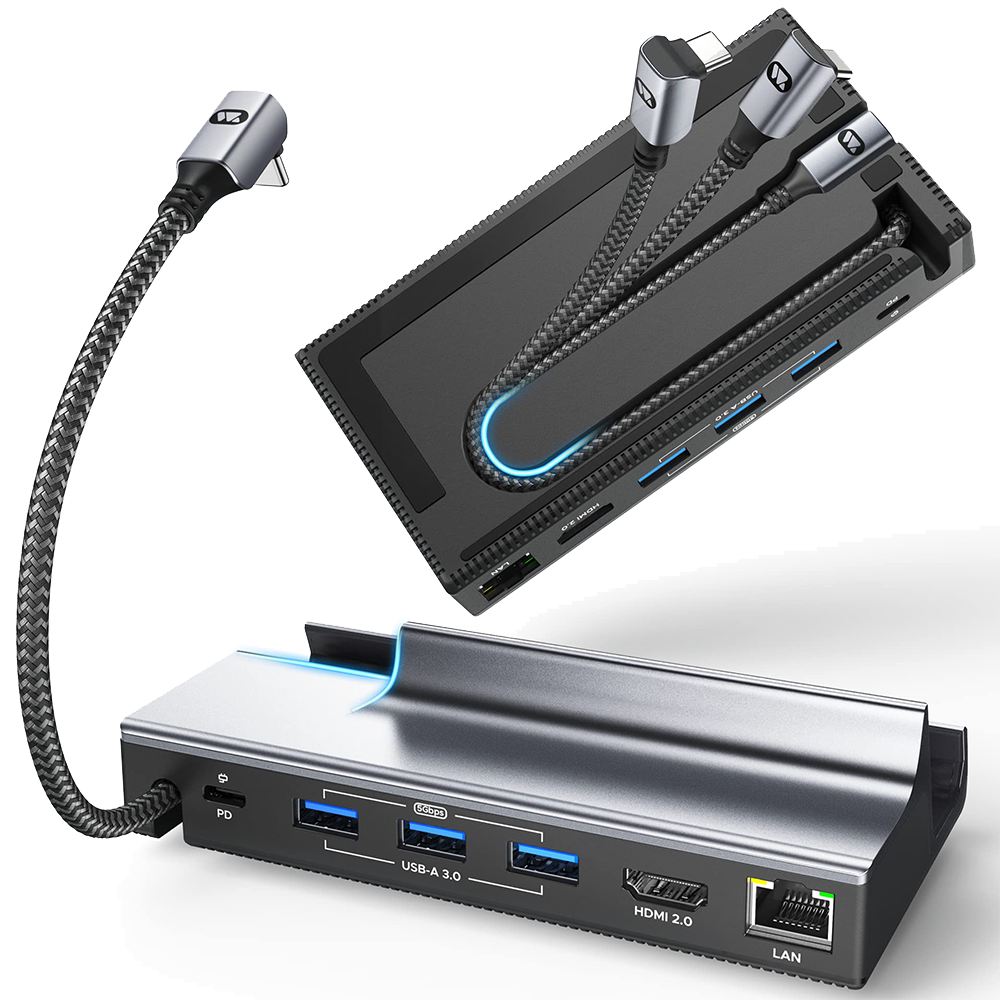
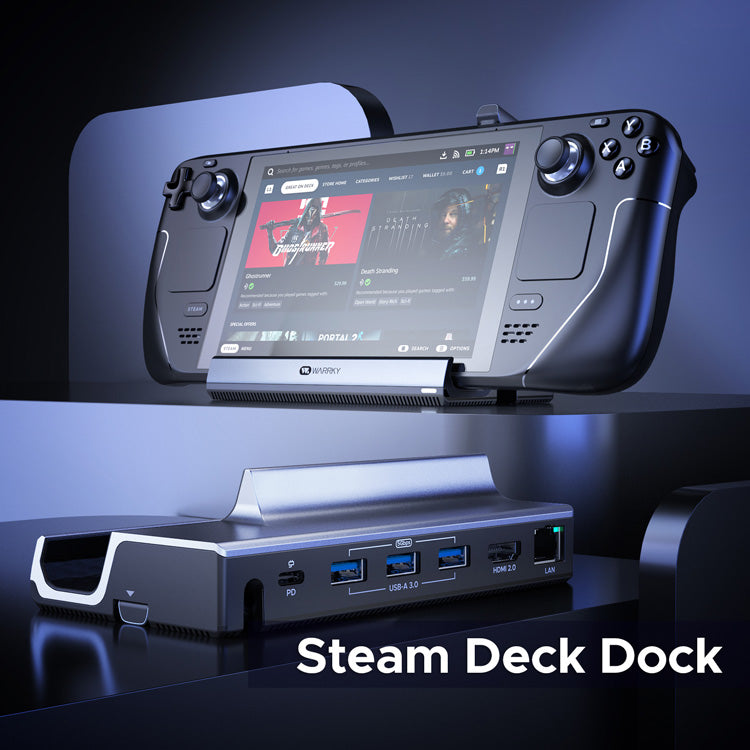
6 in 1 Steam Deck Dock
If the solutions below cannot help resolve your issue, please contact us. We will provide help as soon as possible.
Is this dock compatible with samsung dex on my samsung galaxy s22 ultra cellphone?
This dock is compatible with Samsung Galaxy S22 Ultra, and it would work with DeX mode. Besides, WARRKY provides Lifetime Unconditional Warranty for all the products we sold. You may go ahead and purchase with confidence.
--------
This dock works for most Type C devices but it requires the Type-C port to feaure the video output function to utilize the HDMI 2.0 port. Typically, USB C 2.0 or 3.0 cannot achieve that. Not compatible for Nintendo Switch.
Will the charger included with the steam deck work for the dock or do I need a stronger charger? I know 100w is listed and 45w is max for the deck.
The charger included with the steam deck will work for the dock. We strongly recommend the official Valve Steam Deck charger which proves to be the most stable one in terms of compatibility while third-party chargers face various compatibility issues like "slow charger" hint.
How do I download updates for the dock software? Using with steam deck.
Please kindly note that No extra software is needed for this plug&play dock. And we recommend you to keep updating the Steam OS to the latest version.
What should I do if I can't get 4K resolution with some games?
The settings of some games are limited to the default 1280x800 in Gaming Mode. Please turn to Game Settings>Properties>General>Game Resolution to achieve higher resolution. Meanwhile, make sure HDMI ports and cables are HDMI 2.0 or above.
Why is the display functioning with problems like flickering or black screen?
Connect the dock with the original charger for sufficient power. Change an HDMI cable (version 2.0 or above). When playing 3A games, lowering the resolution would increase the frame rate. Update the Steam OS to the latest version.

VR Link Cable 15ft White
If the solutions below cannot help resolve your issue, please contact us. We will provide help as soon as possible.
Does not work
Please follow the troubleshooting steps below to resolve your issue:
- Make sure your PC meets the recommended specs by Oculus.
- Make sure to plug into a USB 3.0 on your PC.
- Make sure your Oculus software is up to date on both your PC and your headset.
- Ensure all drivers needed (windows/GPU/USB) are fully updated.
- Disable the following settings if they are turned on:
- -PC Oculus software: PTC (public testing channel)
- -Headset Oculus software: Air Link
- -Windows 10: Game Mode
6. Disconnect the link cable on both ends and reboot your Quest headset.
7. Reboot the Oculus software (Settings > Beta > Restart Oculus) and reconnect the cable to use Link again.
Charging devices
Oculus Official says Link cables cannot charge your headset while in gameplay, but slow the
depletion of the battery. Thus, Using Quest Headset with Link connected can last longer than
using the headset standalone.
Plugging into a USB 3.0 port (mostly output 5V, 1A), link cables can provide current as:
-WARRKY 6mm cable: ≈1A
-Ordinary 4.5mm cables: <0.8A
Besides, this cable also can support up to 3A current to fast charge at 15W if you use it with a
wall charger (5V, 3A).
Meta Quest Link audio troubleshooting
If you don't hear any sound, or are having trouble with your mic when using Oculus Link, make
sure that your software is up to date and that the volume is not muted on the device andcomputer. Next, check the audio input and output sources for both your headset and your PC.
To check the audio input and output for your Meta Quest:
- Open the Oculus app on your computer.
- Click Devices in the left side menu and then select Meta Quest and Touch.
- Below Audio Output in VR, make sure your Meta Quest is selected.
To check the audio input and output for your PC:
- Click the Speaker icon in the taskbar in the bottom-right part of your screen.
- Click the ^ arrow to open a list of audio devices connected to your computer.
- Check that your audio and mic are both set to Oculus Virtual Audio Device.
Additionally, if you are using any third-party VR software on your PC, make sure that Oculus
Virtual Audio Device is set as your audio input and output source there as well.
No Headphones Detected Error
If you've received an error message while using your Meta Quest 2 with Link, please try
these troubleshooting steps:
- Enabling the Virtual Audio Device
While the error message and your PC both reference headphones as the issue, there's a high
probability that the issue isn't with physical headphones. When using Link, the Oculus
desktop app sees the Virtual Audio Device as a physical audio device (like headphones). To
fix the issue:
- On your PC, navigate to Windows Settings > Sound > Manage sound devices. This should show all of the sound devices currently being recognized and prioritized by your PC.
- Select Oculus Virtual Audio Device
- If the device is currently disabled, enable it, then restart your computer.
- Updating Drivers
If this method doesn't work, make sure that you have the latest drivers and that your Meta
Quest headset is also up to date. To check for driver updates:
- Close the Desktop app.
- Press the Windows key + R on your keyboard to open the Run command.
- Enter C:\Program Files\Oculus\Support\oculus-drivers.
- Open oculus-driver.
- Open the Oculus app and then try to connect your headset again.
Your Meta Quest will receive software updates when plugged in and not in use.